Robocode/Eclipse/Create a Project
In order to build a Robocode robot in Eclipse, we first have to create a Project to store them in. This page will assist you in setting that up.
Contents
Creating a Project for your Robots
First, select File->New->Project in the menu.
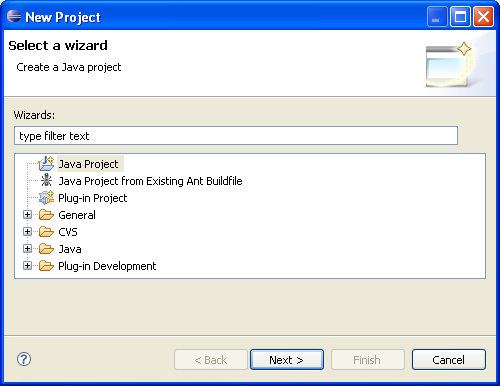
In the New Project dialog, select Java Project then click Next.
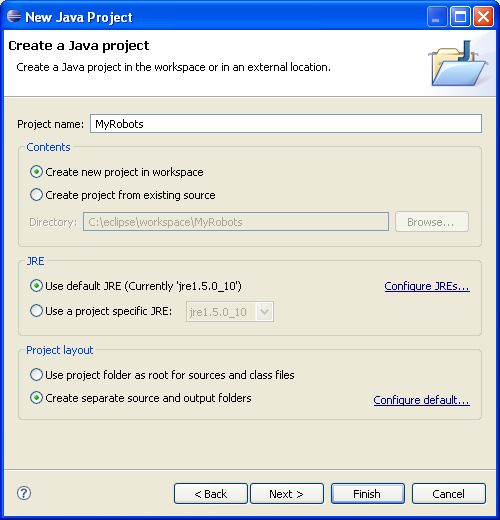
Type in a name for your project. A project can contain just one robot or many robots, so choose a name to suit your plans. Here we use the name MyRobots as the name for the new project. When you have written the name of the new project then click Next. But do not click Finish yet!
Oops! I clicked Finish. What to do?
If you clicked Finish by mistake, you can find the rest of the screens shown by right-clicking on the project named MyRobots, then select Properties, and then select Java Build Path.
New Project
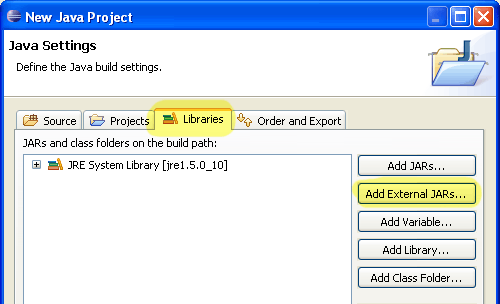
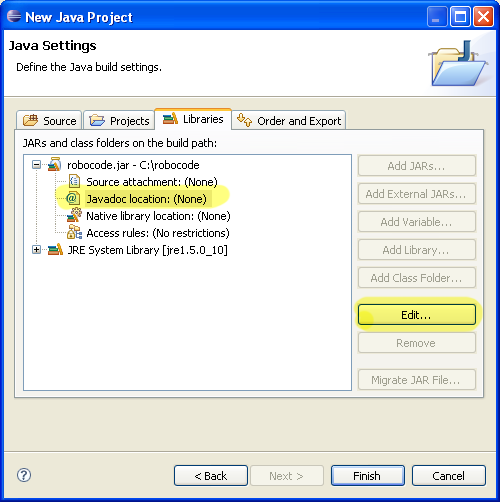
Select the Libraries tab, then click on Add External JARs:
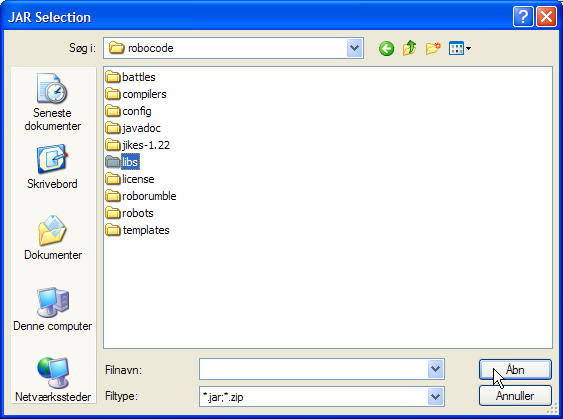
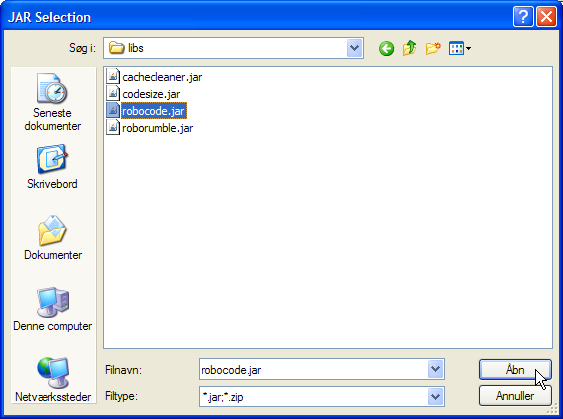
Browse to the robocode directory, select the libs directory and then click the Open.
Next, select the robocode.jar and then click the Open.
Now you must select the Javadoc location: (None) under robocode.jar and click Edit...
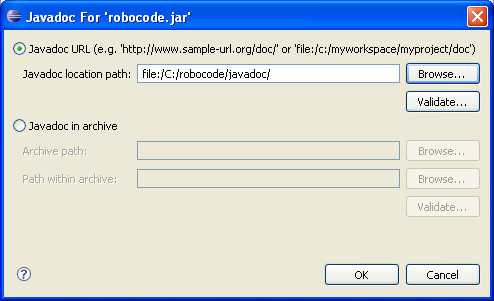
Type in (or browse to) the path for robocode.jar again. Optionally, enter the location of Robocode's Javadocs. The window should now look like this:
Click OK, then click Finish to build your project.
Congratulations! Your new project is ready. :-)
Note about module-info.java
Please note that the newest versions of Eclipse will ask if you want to create a module-info.java file. If you get this question, you should select "Don't create".
If you by mistake create a module-info.java, then you should make sure to delete it to avoid compiler and classpath issues. The module-info.java is not used for Robocode packages.
References
See also
Using Eclipse IDE
- Using Eclipse as IDE
- Add robot project from an IDE into Robocode
- Creating a robot in Eclipse
- Running your robot from Eclipse
- Debugging your robot with Eclipse
Robot API
Tutorials
- System Requirements for Robocode
- How to download and install Robocode
- The anatomy of a robot
- Getting started with Robocode
- My First Robot Tutorial
- Robocode Game Physics
- Scoring in Robocode
- Using the robot console
- Downloading other robots
- Learning from other robots
- Package your robot
- Frequently Asked Questions (FAQ)
- Articles about Robocode
- Starting Robocode from the command line
- Graphical debugging


