Difference between revisions of "Robocode/Eclipse/Create a Robot"
m |
|||
| Line 63: | Line 63: | ||
* [[Robocode/Console Usage|Starting Robocode from the command line]] | * [[Robocode/Console Usage|Starting Robocode from the command line]] | ||
* [[Robocode/Graphical_Debugging|Graphical debugging]] | * [[Robocode/Graphical_Debugging|Graphical debugging]] | ||
| − | |||
=== News and Releases === | === News and Releases === | ||
Revision as of 23:34, 10 October 2008
This page describes how to create a robot in Eclipse, and assume that you already now how to create a project in Eclipse.
Contents
Creating a Robot in Eclipse
Ok, so we have a project now, and it's time to create a robot (or many robots!) in it.
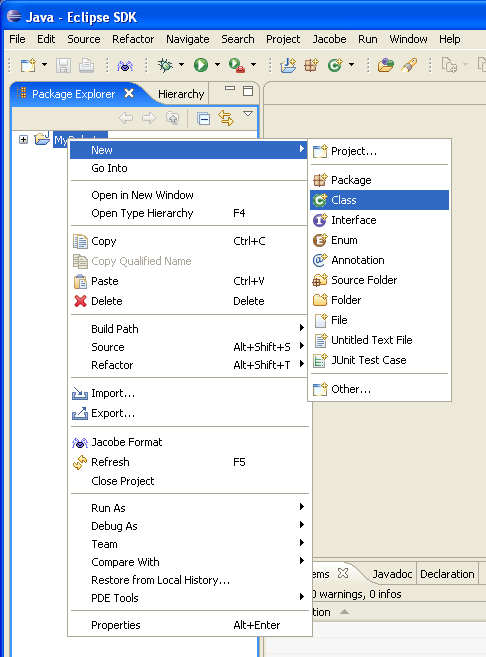
First, right-click on the MyRobots project, and select New -> Class:
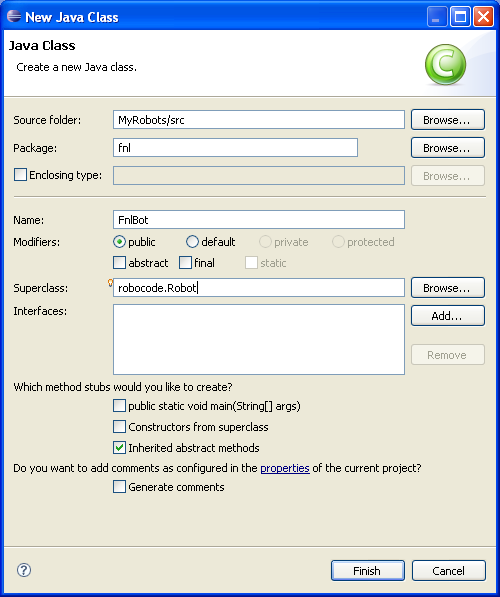
Next, fill in the package name (Robocode suggests your initials), a Robot Name (here I have FnlBot), and change the Superclass field to robocode.Robot:
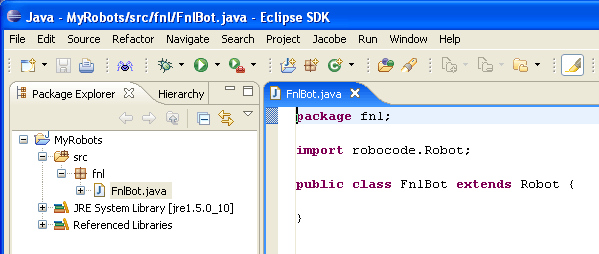
Click Finish, and you'll see your robot class, like this:
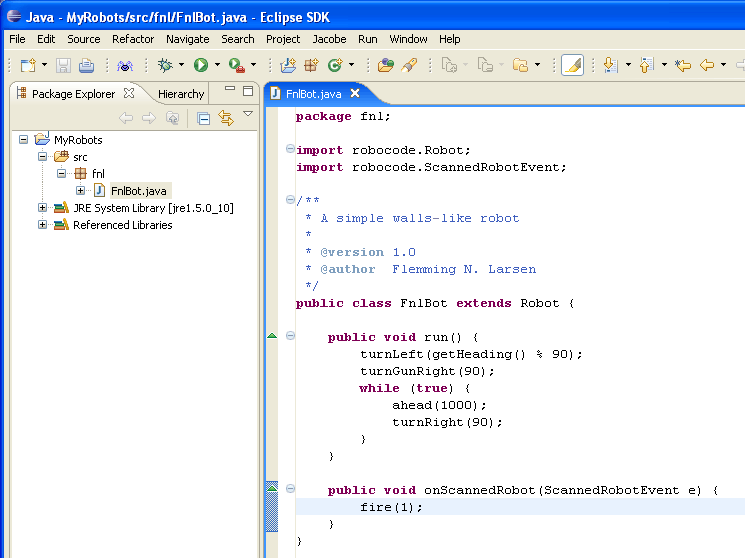
You can now edit your robot however you like.
You can save your robot as often as you like by hitting CTRL-S, or selecting File->Save. There's no need to explicit select Compile (as in the Robot Editor for Robocode) anymore, since Eclipse automatically takes care of this task for you, when you make changes to your files.
Have fun playing around with Eclipse. Since there's no better way to learn than by playing around, I'll leave you to it!
The only thing left is to make sure that Robocode sees your robot.
References
See also
Using Eclipse IDE
- Using Eclipse as IDE
- Creating a project for your robots
- Add robot project from an IDE into Robocode
- Running your robot from Eclipse
- Debugging your robot with Eclipse
Robot API
Tutorials
- System Requirements for Robocode
- How to download and install Robocode
- The anatomy of a robot
- Getting started with Robocode
- My First Robot Tutorial
- Robocode Game Physics
- Scoring in Robocode
- Using the robot console
- Downloading other robots
- Learning from other robots
- Package your robot
- Frequently Asked Questions (FAQ)
- Articles about Robocode
- Starting Robocode from the command line
- Graphical debugging


