Robocode/NetBeans/Configure
This article shows how to configure NetBeans in order to use it in building a Robocode robot.
Contents
Software Requirements
How to configure NetBeans
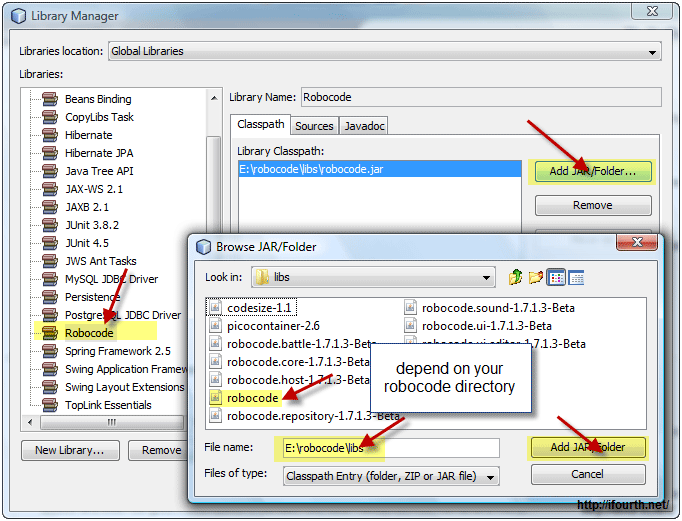
Firstly, we go to Tools > Libraries to start the Library Manager
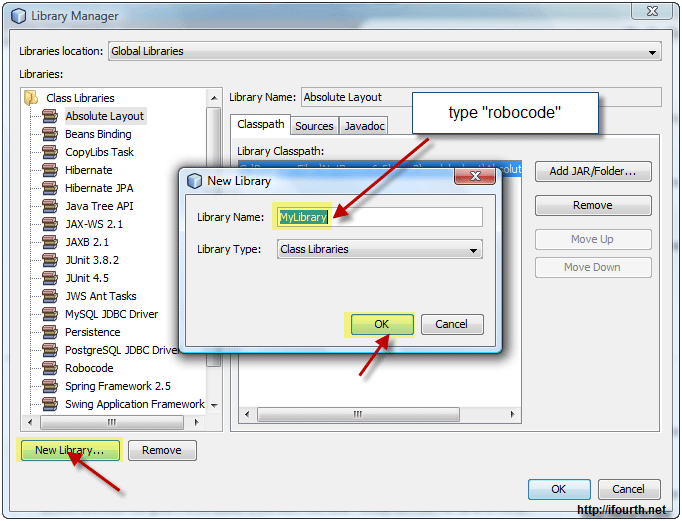
Select the New Library button.
Then, type the name of the library, for instance robocode. Click OK.
Next, on the left hand side select the library you have just created and click on the Add JAR/Folder button on the right.
Navigate yourself to the libs folder in the main folder of Robocode and select robocode. Finish this by clicking the Add JAR/Folder button.
Adding the Robocode Library to an existing project
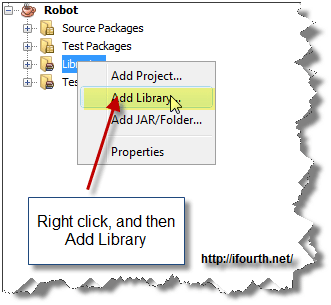
Right mouse click on Libraries in your project. Then, select the Add Library button.
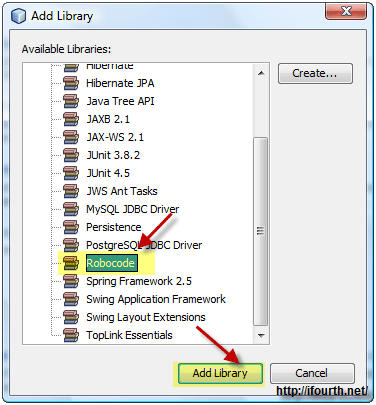
Select your Robocode Library and click Add Library.
Showing Robocode where your robots are
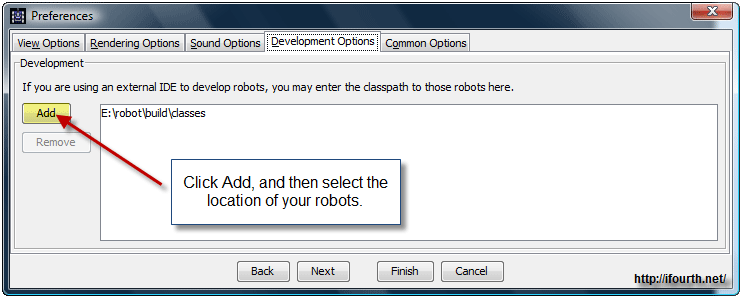
From the Robocode GUI select the Options drop-down menu, then Preferences.
Go to the Development Options tab and click the Add button.
Finally, select the location of your robots and click Finish.
Remember to create first the NetBeans project and then to select the location of your robots.
See also
Using Eclipse IDE
- Using Eclipse as IDE
- Add robot project from an IDE into Robocode
- Creating a robot in Eclipse
- Running your robot from Eclipse
- Debugging your robot with Eclipse
Robot API
Tutorials
- System Requirements for Robocode
- How to download and install Robocode
- The anatomy of a robot
- Getting started with Robocode
- My First Robot Tutorial
- Robocode Game Physics
- Scoring in Robocode
- Using the robot console
- Downloading other robots
- Learning from other robots
- Package your robot
- Frequently Asked Questions (FAQ)
- Articles about Robocode
- Starting Robocode from the command line
- Graphical debugging
